Tuesday, October 6, 2015

Classroom Library Gets a Make-Over

I may have mentioned before that my classroom has a whole wall of nearly floor to ceiling shelving. This is definitely a curse and a blessing. Most of the time I keep the sheets down because it's just too much to look at but I'm pretty stoked about how nice it looks now that it's part of my library.  That is my magazine rack on the top. It's got Zoo Books, Highlights and National Geographic Explorers magazines in it.


I designated one shelf to non fiction. I got the book boxes and labels from Really Good Stuff (LOVE that place!) ANYWAY!!!! We have a book box full of Health books that include books about the body, exercise, doctor visits, and cook books. I have a book about machines (I have a vehicle series: Bulldozers, etc. and some simple machines from our science unit in there). Then I have a Social Studies and History box with books about different places around the world, or about different coins, or wars, etc. I have a box filled with nature books (volcanoes, climates, earthquakes, wild weather, etc.), A "People and Jobs" box filled with famous people and popular jobs. The last pink box is one with our class books in it. I use Student Treasures to let my students have the experience of publishing our very own hardcover book. It is awesome and we always get a free one for the classroom. So the pink box has those books from past years.


I've got all of my chapter books on this wall: Nate the Great, Horrible Harry, Kung Pow Chicken (the school bought it for us last year... this is new to me and I haven't read them but they look like something 2nd, 3rd, and maybe 4th graders would enjoy. They are pretty funny from what I've seen), Junie B. Jones, Marvin Redpost, Ready Freddy, My Weirder School (if you haven't read these, they are totally entertaining and usually about a buck in the Scholastic Book Orders). In the last green box we have Bailey School Kids, Calendar Mysteries, and Flat Stanley books. I try to only have one series per box but it's not always possible so when I label it, I show which side a specific book series is supposed to be on. 
Under that row I've got my Magic Tree House collection (and let me tell you I am going to have to get a new box because this one is squishy full!), Jigsaw Jones, Cam Jansen and The Littles.
I really like having all of the chapter books in one spot.
It's also the last part of the Library that I open up to kids. They practice finding books on the cart and being able to put them back in the right places on the cart before I lift this beautiful curtain. 
What Cart? You ask?!!! Well... keep reading to find out!


While my real goal is to teach kids to find Good Fit Books on their own by checking:
I-Independent (I-Pick)
P- Purpose (Why do I want to read this)
I- Interest (Am I interested in this book)
C- Comprehension (Do I understand what I'm reading)
K- Know the words (Can I read most of the words)

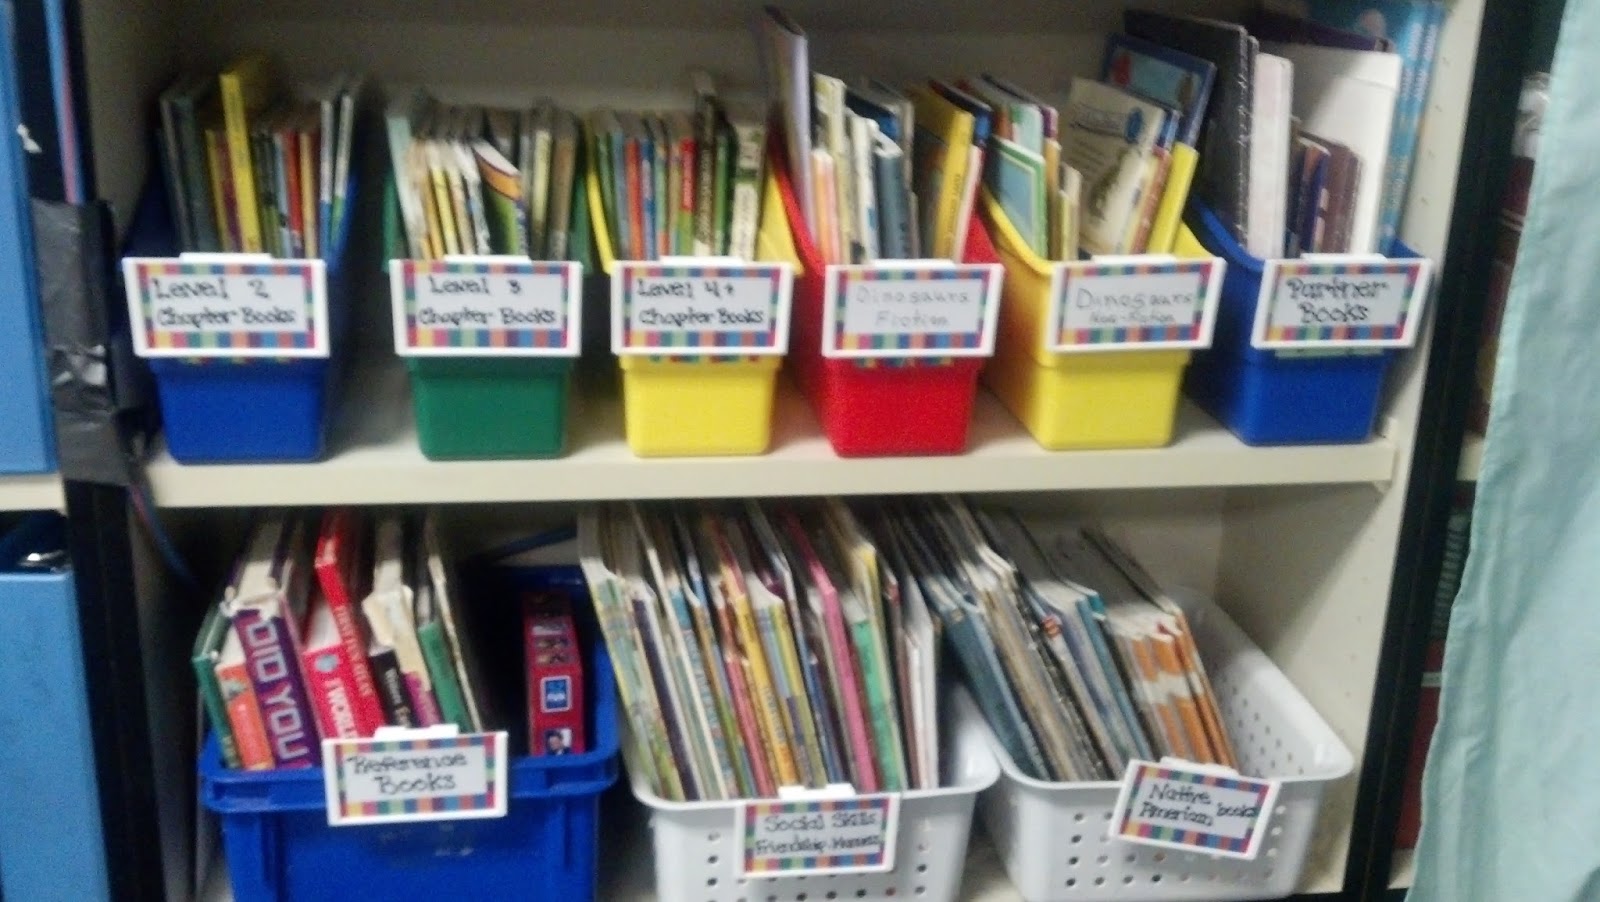
... it doesn't usually work out that way in 2nd grade. Or if most of your students can, there are still those who struggle and want to read the harder books to fit in with their friends, get frustrated and bored because the book is too difficult, and then think that reading is boring and dumb... Or those who never challenge themselves and continue to pick out Kindergarten level books when they are really 2nd or 3rd grade level readers.  SO.... I also level my extra chapter books for those kids that want to be able to find something in their level first... then look to see if it interests them. So I have a book box for level 2, 3, and 4 chapter books. Next to that I have my dinosaurs boxes (one fiction, the other non-fiction). The blue box on the end is my "Partner Books" box. If I have multiple copies of a book, I will put two of them in my book box so that partner readers can both have their own copy of the book while they read together.
Underneath those I have reference books (atlases, guiness books, fun facts, children's dictionaries, etc), Social Skills, Manners, and Friendship books ( I have a lot of those!), and Native American books and stories.


WE FINALLY COME TO THE CARTS!!!! Na... they aren't really all that cool... pretty much the same as the book case.
This cart is labeled with levels like that last picture of the book case. Our school library is Accelerated Reader Leveled, so I do that in my classroom library as well. And if you know AR at all, the preK-K books are labeled gold, the 1st grade books are blue, 2nd grade is red, 3rd grade is green, etc. So I did that with my boxes. Granted I don't have too many AR books in my library that are below first grade, so those fit in the first section of the first grade bucket. What I love about these buckets is that they are divided into 3 sections. On the top edges of the buckets, I put which levels go in which section. The idea is to keep the library as clean as possible, right!? So the front is labeled and the edges are labeled more specifically. I also have a box for stories they might like that are not AR quiz books. 


There are some more of those down here. The kids love the big Disney Story Books, I have a few 4th grade level picture books on the bottom. I honestly don't get too many 2nd graders reading 4th grade books and if they do... they are so excited about reading chapter books that they barely glance at the picture books. I also have a box with Whisper Phones for easy access.


The next cart is one that the kiddos LOVE. One of my 2nd grade leveled boxes spilled over to this side but other than that, it's just a plethora of 2nd grade favortites!!! The kids adore reading about animals, so my NF animal book box is always overflowing at the beginning of the year. My Dr. Seuss books go first, though, hands down! Phew I think I was down to 5 books left in that box after they all picked their books.
I label them Front, Middle, and Back to help kids see all of the options. My next step will be to have little pictures next to the words to help as well. I try to place the easier books in the front so they are easier to find.
We've got: Black Lagoon, Franklin, Fancy Nancy, If You Give, Arthur, Magic School Bus, Little Critter, Pinky and Rex, and Amelia Bedelia.


The bottom of my last rack has Pet the Cat, Bear Stories (Little Bear and Corduroy), Skippyjon Jones, Clifford, Fox books (like Fox All Week, etc), Oliver and Amanda Pig Books, Berenstein Bears, Henry and Mudge, and the back is more Cynthia Rylant with Mr. Putter and Tabby and then a couple Annie and Snowball books.

I've only just opened up the carts... no shelves yet. The students are just starting to really practice checking out and putting away their books, so we will see if this organization will actually work this year. It's always a challenge to keep the library organized. But I think with good, clear, labeling and color coding, there is a pretty good chance we will see some positive results! 
Happy Fall to all of you teachers and I hope that your library's will stay organized for the year to come!

Thursday, August 15, 2013

Crate Seats and Duct Tape Lamps


Crate Seats!

As I've been pinning throughout the summer, it seemed that nearly every teacher had a type of crate seat in their classroom, and I thought, "Uh! I want me some of those!" So I googled directions on how to make them and what materials to use, and let me just tell you... I ended up not using anything I found on google and I went to my most reliable source... MY GRANDPARENTS! 
My Grandpa Jim has always helped me with any projects I have and so has my Grandma Judy. I told them what my plan was and already, I could see the wheels in their heads turning as they brainstormed the best way to do these: Do we set the cushion inside on the lip of the crate and use a pull tab to open them? Do we put hinges on the back? Well, we decided to build a frame that fit snuggly inside on the lip but have the cushion above that sitting on top of the crate.
We didn't have any plans, we just went with it and made decisions as they came up, so I wouldn't think to even try sharing it... but I think they turned out so dang cute that I felt I should at least give it a shot!

~All of my amounts are for 6 crate seats, so adjust depending on how many seats you plan on making~

To start with, I bought 6 crates in 3 different colors (teal, green, and white) at Target. They are under $4 a piece. You will also need 1 sheet of Plywood, 2 long pieces of 1"x 2s", quilt batting, foam, material of your choice, a staple gun, staples, a drill, wood screws, and we used a jigsaw and sander for the corners of the plywood.

You can choose which type of batting you prefer. We mixed and matched a little bit. You will need approx. 22" of batting for each seat.

We cut each piece of plywood 13 3/4" X 15 3/4" then rounded the corners off. Same for the foam. You don't need to round the corners of the foam because you'll be pulling the batting tight around the corners and that should help. We got 45" x 44" pieces of fabric to make 2 seats by cutting it in half (22.5"x 44")

 So... place the foam on top of the plywood, and the batting on top of the foam so there are equal amounts hanging on each side. Then flip it all over. Pull up your corners first, nice and tight, and then staple. After you get all the corners done, proceed to do each side, trimming all excess material as you go. We found that doing opposite sides worked best to keep everything nice and even. Then do the same thing with the fabric. Only, there will be a lot of fabric hanging on one side and that is to cover the bottom of the plywood. You don't have to do this, but I thought it gave it a neat and clean look to it.
Depending on what type of staple gun you are using, you may have to hammer the staples in to the plywood to get them smooth.


When we got to the last piece, we folded the bottom under and stapled it down so that we didn't have strings fraying on the edge.
With the first part done, the second part requires some accuracy, and that is why I let Grandpa do it! You will need to cut your 1x2 in to 11 1/4"(x12) and 13 1/8"(x12). You will need two of each for each seat. 
Then fit them snuggly together like little puzzle pieces and screw them into place!


They will turn out like this!!!!  Aren't they just fun looking with all of their different patterns?!
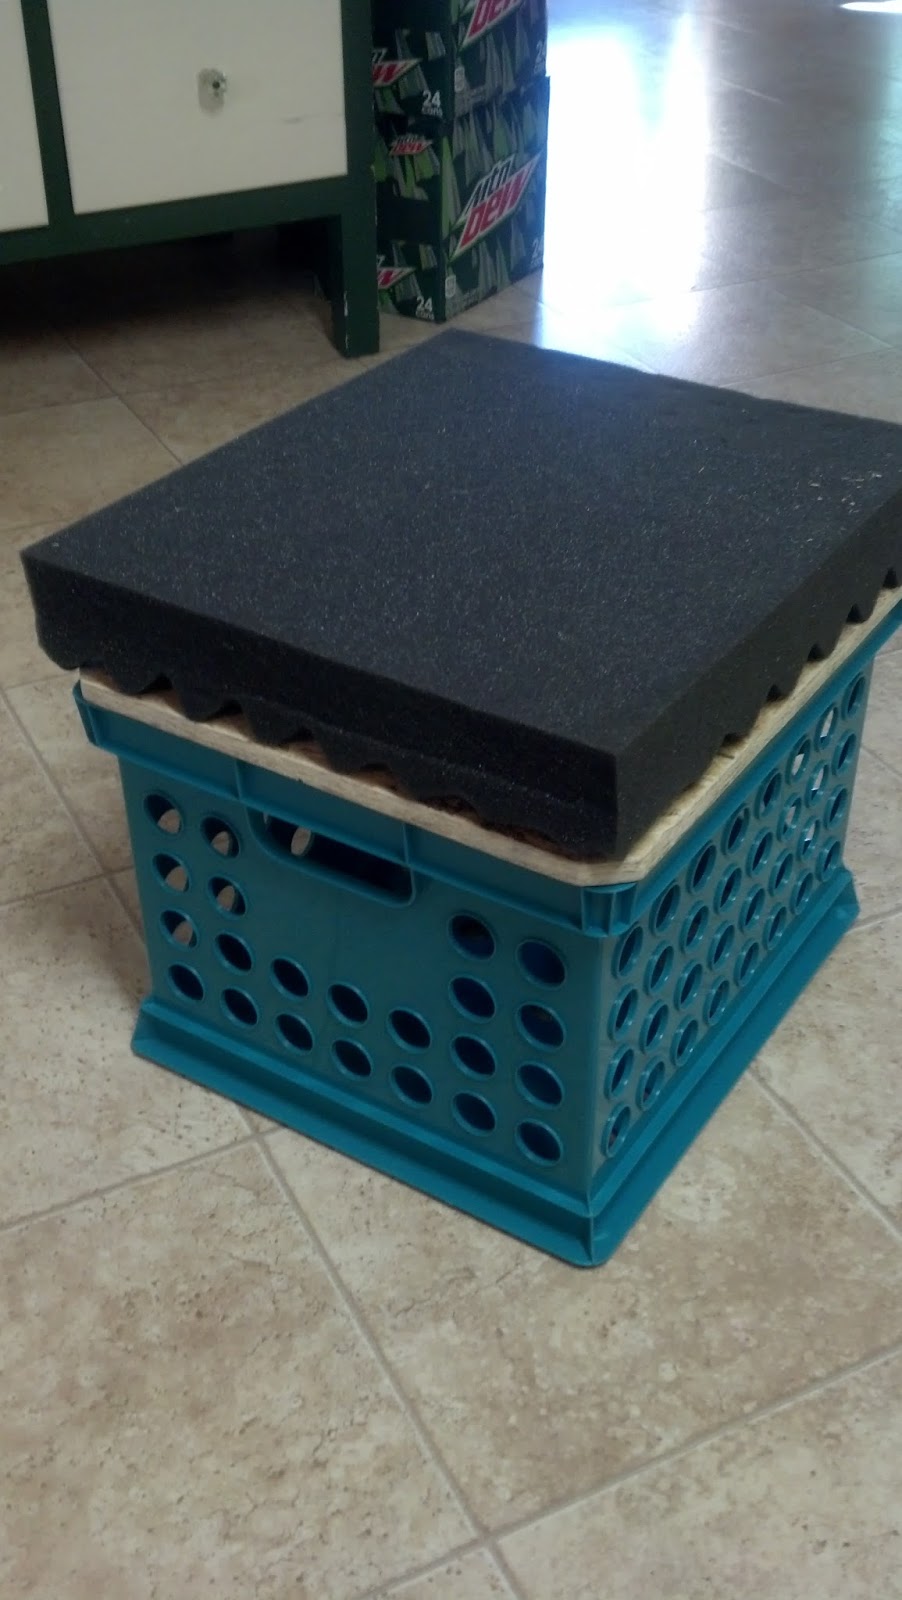
 I will be using mine at my small group table. They are so much more comfortable than the student chairs and the are twice as useful since you can store things inside of them, as well!!!


 ~~~~~~~~~~~~~~~~~~~~~~~~~~~~~~~~~~~~~~~~~~~~~~~~~~~~~~~~~~~~~~~~~~~~~~~~


 I also started another project last week and I am nearly done, with: DUCT TAPE LAMPS!!!
Sure... most of the lamp is normal: I found on Craig's List a hotel refurnishing place that had all floor lamps for $10! So I bought three of them in that old brassy color (Bleh!) and I spray painted over it using Rust-O-Leum paint to match the rest of the decor in my room (GREEN!).  But the shades that came with them were just plain Jane white! So I went to target and found some of that pretty duct tape they have now and did up the shades in a cutesy pattern! What do you think! I'm pretty proud of myself!


I've got a couple more projects I hope to have up by the end of next week. I've been working in my room to get rid of all the junk(I have dumped about 6 boxes of "stuff" in the teachers lounge for people to pick and choose from!) and get it all ready for September, but they will be waxing the floors in front of my room next week so I'm out until the 26th! Ugh! So close... and yet way way WAY too far away!
Until next time... enjoy these last few weeks of sunshine and summer!

Saturday, July 20, 2013

RESPONSIVE CLASSROOM: Rules in School

Responsive Classroom is used throughout our school. It's such a positive thing to have the entire school on the same page. It shows consistency for the students, and students are aware of the consequences (although those may vary slightly from room to room...) are the same throughout the school. One thing that we do at the very first day/week of school is determine our hopes and dreams for that school year.


We color in our little people to show that we are all different but we can all work together to achieve our dreams. For my class, this past year, we put our hopes and dreams on hot air balloons, then drew ourselves in the basket. Then each student shared their H&D to the class. A
s they presented, I wrote down their dreams on a piece of poster paper as an easy reference guide.


 I did this Hopes and Dreams project with my Drama Club. The poster read "Our Hopes and Dreams for Becoming Stars in Drama Club!" Each student drew themselves in the box and wrote their dreams for Drama Club on the lines below.

After students have decided on their goals for the year, we present our hopes and dreams to the class. Now we discuss, "How can we all achieve these hopes and dreams? Will we do it alone? Etc.."
What we get from that are rules that we all must abide by if we want to achieve our dreams and help others achieve theirs.

When the class started veering from their normally great behavior, we would look at the rules and talk about why we chose them. Usually after a class discussion, things would get better.  If things got really out of hand, we took the time and went back through all of their hopes and dreams, checked if they had  achieved them yet, checked if continuing with the current (bad) behaviors would help them achieve their dreams, or not... and then took it from there. At one point, it must have already been March or April, most of the students had in fact achieved their hopes, so we created new goals to try and reach by the end of the year. I kept up their old ones and added their new ones to it.

It's a great tool and reference to be able to turn to and it gives the kids a feeling of ownership over their class as well as a sense of purpose and direction to start the year off.

Do you have a classroom management plan that you swear by? I would love to hear it. Often times, we take a little from here and a little from there to achieve the perfect... well, the perfect ANYTHING! So share your ideas, and perhaps, we will create the most perfect classroom management plan!

POSTER POCKETS Organize your posters

There was a lot of stuff in my classroom when I moved in. That can be a curse and a blessing. That means that I don't have to spend money on a lot of things new teachers need to get and I know that if the other teachers in the school have it, I probably have it somewhere, too.
That's where the problem is...SOMEWHERE in my room are a million things that I don't even know I have! So... "Just throw it all out," you say? Oh, I wish I could... but I didn't know what I needed to keep and what I could dump.  After 2 years, I'm starting to figure out what I use most often (the problem is... I keep trying new things!!!!) and I can start getting rid of some things.....
SO...

Here is my big-yellow-rolly-cart that holds all of my posters, borders, and such things... Does anyone have a better name for this?!
ANYWAY!!!!!................ There are very thin drawers to hold all of the posters and borders you can imagine! It is very nice storage with tons of space. This is one of those things I'm very glad that I have inherited. Inside were a million posters all jumbled into one giant mess. I don't think I actually opened it up my first year because it was impossible to find anything. So... last summer, one of my projects was to organize that sucker!

I took EVERYTHING out (Oofda! There was a lot!), and sorted them into piles. While I was doing that I came across some giant sheets of poster paper! So working with what I had, I folded the poster paper nearly in half but with about 3 inches left up top to Label the new POSTER POCKET according to which posters went in. Then I stapled up the sides.


Then I took pictures of each bunch so that I could tape them to the front of the POSTER POCKET and see what was inside each pocket. 


When it came time for the borders, I lay the poster paper the long way and accordion folded it until it made about 3 sections to hold borders. I stapled up the sides, trimmed down the borders, and voila! I've got my own border control!  I do not have a picture at this time, but I will post it when I do!
Finally, I designated each drawer to specific POSTER POCKETS: borders in the top drawer, social studies and science in the next drawer, reading/language arts in the third, etc...

It is so much easier to find what I'm looking for now! And I also know what I have in the drawers, which is a huge step from before I started the project!

How do you organize your posters and borders?

Before pictures... WAY before pictures, and eventually... AFTER PIctures...


 I'm not sure if you know... but I inherited many things in my classroom from the previous teacher, so I did not have much room for my own things!
 This is what my room was like at the end of my first year! I look at all of these other beautifully organized and decorated rooms on all of these other beautifully organized and decorated blogs and I knew I had a long was to go before I could even think of decorating! I needed ORGANIZATION first! I need to get rid of things and tone things down a bit!!! SO..........


Here are pictures of what I started my room like at the beginning of the year LAST year (2012-13) I did move a few things around by the end of the school year, but it got so hectic that I didn't have time to take pictures of that. I'm so excited for what I have planned for this year that I can barely contain it. The pictures up top are like pre-before pictures... the pictures following are the before pictures and hopefully soon, we will have some after pictures.


 I have a fairly small room and I have one wall that is entirely shelving with no doors....
(I put velcro on the top of the shelving and then sewed it on to some sheets to work as fast acting doors. This is my project I'm working on this summer!)


And one wall that is entirely cupboards.
Then I have one wall that is dividing my room with another room. You can't nail or tape anything to the wall because of its texture, but its all magnetic, so that's a plus. Then the last wall houses my SMARTBoard and It's the only wall that has white boards and bulletin boards. My first year, I actually didn't have a white board, but apparently someone was going to get rid of one and I joinked that up in a  hurry!

Now, in the past, I really don't think that I have utilized this space with the full potential that it really has, when I got placed in this room, it was left with all of the previous teacher's acquirements from the last umpteen years so I spent the whole first year trying to clean out some of the piles... What you see now may look plain, dull and empty, but to me... it was heaven. I actually had room for some of my things and to start getting ideas for what I wanted to do to the room! So now, I am excited to start experimenting with it this year!


This was my listening station...


And my small group area. I got rid of my desk this past year (and I really don't miss it) so this was "my" space. Again... I know that I could better organize my back shelf to be more efficient (and a bit cuter, too)!!!


This corner had my Word Work shelf, manipulatives, and a writing or work table for the students


View of the front of the room from the back.. OH! How boring!!!


View from my door (pretty bare!)


And here is my classroom library:
It's too crammed... I want to fix it up this year to be more accommodating. If you have any advice... please, share!!!


The cart on the right held non-fiction books in different categories, the cart on the left held A.R. leveled  fiction books. The red boxes were 2.0-2.9, the blue were anything below 2.0, the green box was 3.0-3.9 and the yellow boxes on the bottom were 4.0 or higher and were off limits for most of the year. On some of the shelving, I had categorized books. I just used the post-it labels to label them. They stuck all year and still come off like a post-it promises! There were many other book boxes, but apparently I only wanted to take a picture of a couple!

Alright.... To show some more after pictures!

I decided this year to try and keep my Library open so I could fit the whole class in it for stories. I put my CAFE board and Daily 5 board back there to reference easily while we are reading.


I moved my Small Group Table over by the computers. It seemed to have more space this year.


I found these cute baskets on clearance at JoAnn's.


My Hopes and Dreams Board. I made my file cabinets into mini bulletin boards with plastic table cloth and bulletin board border. 

The room continually changes and it will probably forever. Each year I like it a little more!